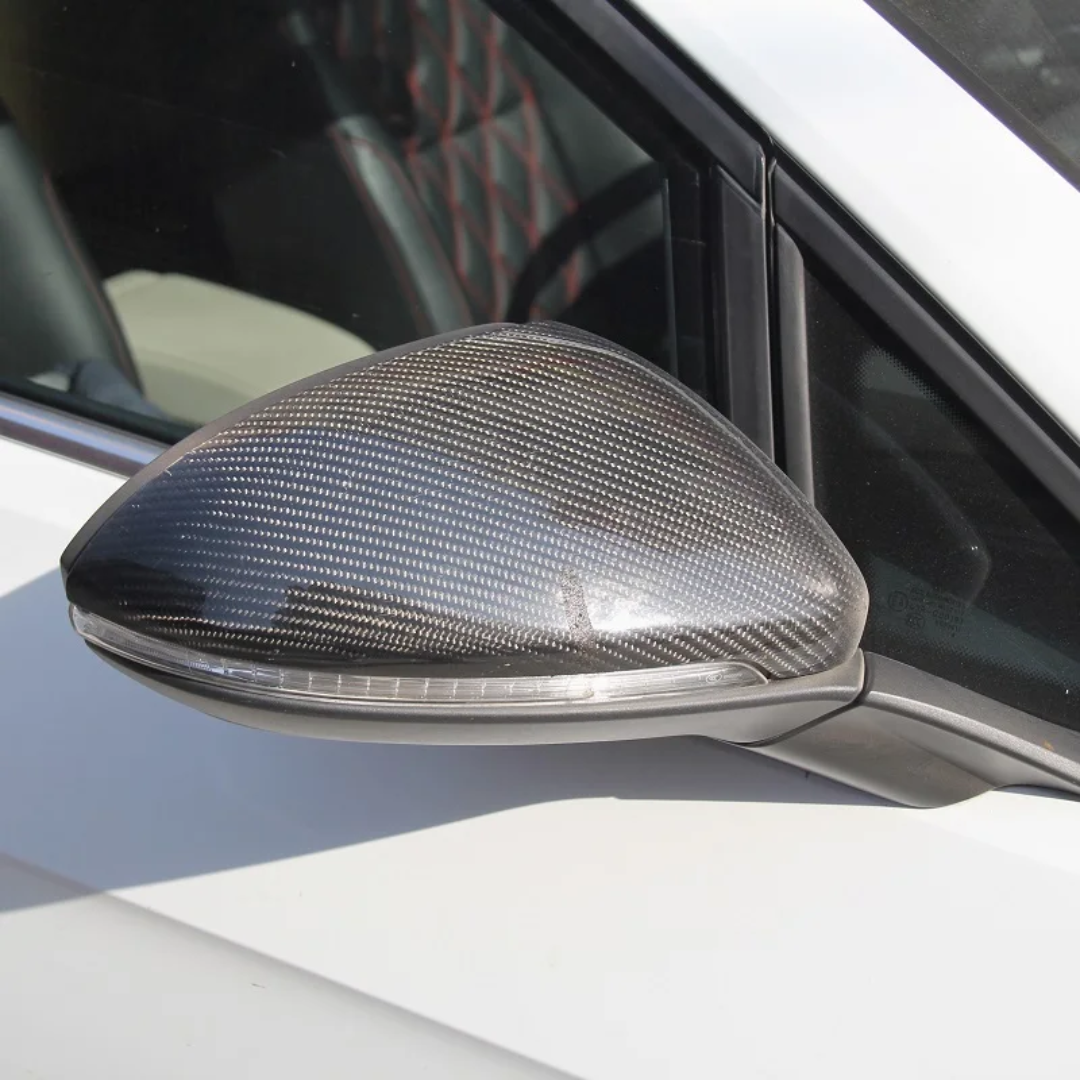


Upgrading the mirror caps on your Mercedes S-Class W222 can enhance its appearance and give it a personalized touch.
Whether you're replacing damaged mirror caps or upgrading to aftermarket ones for a sleeker look, this DIY tutorial will guide you through the process with ease.
From removing the old mirror caps to installing the new ones, follow these steps to transform the aesthetics of your Mercedes E-Class.
Materials Needed:
- Replacement mirror caps
- Plastic lever or trim removal tool
- Torx screwdriver set
Step 1: Pry the Mirror Caps Away
Start by locating the seam between the side mirror cap and the mirror assembly of your Mercedes S-Class W222. Gently insert the plastic lever or trim removal tool into the seam, ensuring not to damage the surrounding paint or trim.
Apply gentle pressure to pry the mirror cap away from the mirror frame:

Gradually work your way towards the door, loosening the clips:

Continue with the upper clips of the mirror cap:

Step 2: Remove the Old Mirror Caps
Continue prying the mirror cap away until it is completely detached from the mirror frame. Be cautious not to damage any surrounding trim or components. Unclip the top of the mirror cap and firmly pull it towards the front of your car to detach it completely.
Step 3: Dismantle the Side Mirror Indicator
If your Mercedes S-Class W222 is equipped with a side mirror indicator, unplug the indicator connector and remove it by unbolting the screws holding it in place using a T10 Torx screwdriver:

Then use a small flathead screwdriver to dismantle the mirror indicator itself:

Step 4: Install the New Mirror Caps
Begin by reinstalling the side mirror indicator, bolt the screws back in place and plug plug in the indicator connector:

Align the mounting tabs on the new mirror caps with the corresponding slots on the mirror frame.
Ensure proper alignment and then firmly press the mirror caps into place until they are securely seated:

Check for any gaps or misalignment and adjust as needed.
Step 5: Final Checks
Before finishing up, double-check that the new mirror caps are securely attached and properly aligned. Test the functionality of the side mirrors by adjusting them using the vehicle's controls.
Once satisfied, take a moment to admire the refreshed appearance of your Mercedes S-Class W222.
Accessories for Your Mercedes
Enhance your BMW with our premium selection of accessories. Upgrade your interior with an Apple CarPlay / Android Auto module to enjoy a fully modern multimedia system.


Conclusion:
Congratulations! You've successfully replaced the mirror caps on your Mercedes GLC, giving it a fresh new look. By following this DIY guide, you've saved time and money compared to dealership or mechanic costs.
Now, hit the road with confidence, knowing you can personalize your vehicle with ease. If you have any questions or need further assistance, feel free to reach out. Happy driving!